Banana Bread in a Jar Recipe – Easy & Portable Treats
Banana Bread in a Jar Recipe – Easy & Portable Treats
Imagine a world where banana bread curves its way into your life in a charmingly compact form. You’ve got a busy schedule, and this Banana Bread in a Jar recipe is designed to fit seamlessly into it—perfect for a quick snack or a thoughtful gift. With just a few ingredients, you can enjoy a delicious treat that’s not only convenient but adaptable to various dietary needs. Curious about how easy it is to whip up these portable delights? The details may surprise you.
Why You’ll Love This Recipe
You’ll adore this banana bread in a jar recipe for its simplicity and convenience. It’s designed for busy lives, with prep time taking just 5 to 15 minutes. You’ll use common ingredients like ripe bananas, sugar, eggs, and flour, making it easy to whip up whenever you crave something sweet.
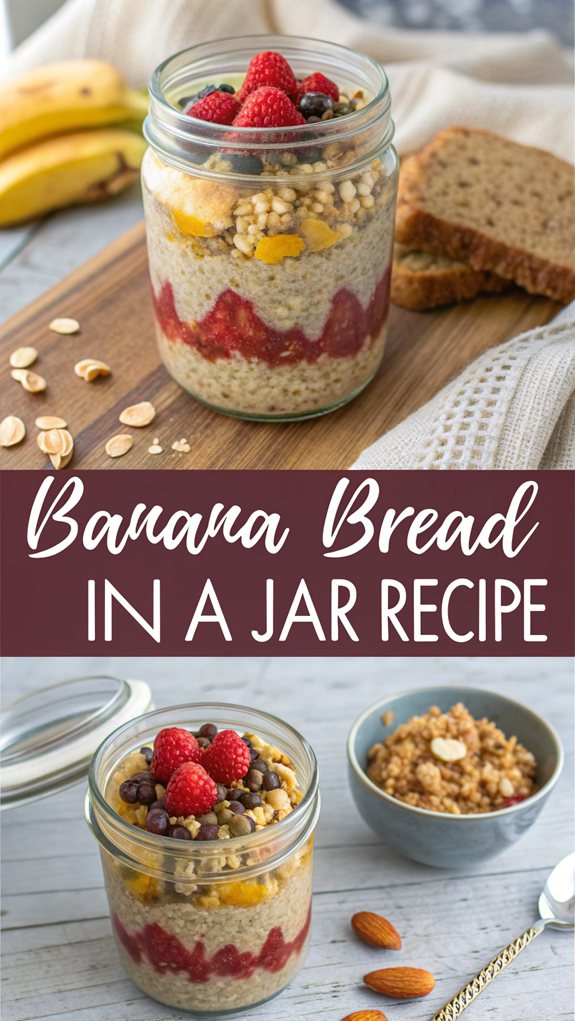
These jars aren’t just for baking; they double as cute serving containers. Each jar holds an individual serving, making them perfect for snacks on-the-go. Plus, if you want to impress someone, they make charming gifts. Just seal them up!
You can also customize the recipe to fit your dietary needs. Want a gluten-free version? No problem! You can swap wheat flour for coconut flour or use dairy-free milk like almond or coconut milk. Feel free to toss in nuts, seeds, or chocolate chips for extra flavor and texture. Additionally, using glass mason jars is recommended as they can withstand the heat of the oven while baking.
Safety is important too. Use high-quality mason jars to prevent breakage, and always handle hot jars carefully to avoid burns.
History
Banana bread’s journey started with the rise of bananas as a popular ingredient in the early 20th century, thanks to refrigeration making them more accessible in the U.S.
Initially, bananas were mostly a garnish in desserts, but that changed during the Great Depression. People began to use overripe bananas in cooking to waste less food.
The 1930s brought about mass production of baking powder and baking soda, which made chemical leaveners easy to find. Consequently, banana bread recipes began to appear in prominent cookbooks, including Better Homes and Gardens.
Early recipes used inexpensive fillers like wheat bran, resulting in lower fat and sugar content.
In the 1940s, wartime rationing influenced recipes, prompting cooks to minimize ingredients.
Fast-forward to the 2000s and 2010s, and recipes focused on healthier options. They featured reduced sugar and alternative moistening agents like honey and jam. This shift in focus was part of a broader trend reflecting health consciousness in cooking.
Today, variations abound, reflecting different culinary trends and preferences.
Whether you’re adding nuts or spices, banana bread has evolved while remaining a cherished staple in many kitchens.
Recipe
Recipe for Banana Bread in a Jar****
This unique Banana Bread in a Jar recipe combines the comforting flavors of traditional banana bread with the charming presentation of glass jars. Perfect for gifting or enjoying at home, this recipe allows you to create individual servings that not only look delightful but also add a personal touch to your baking. The recipe makes 5 jars of banana bread to share with friends and neighbors!
Make certain to have your mason jars ready for a delightful baking experience! You will find that this recipe is flexible, allowing for various mix-ins and even substitutions to accommodate your preferences. Whether you choose to bake classic banana bread or try a zucchini alternative, the result will be a deliciously moist treat packed in a jar.
Get ready to impress your friends and family with your creative baking skills!
Ingredients:
– 1 cup sugar
– 2/3 cup shortening or 1 stick of butter
– 2-4 eggs
– 1-2 teaspoons vanilla extract
– 1 3/4 to 3 1/3 cups all-purpose flour
– 2-4 mashed bananas
– 1/2 cup nuts (optional)
– 1 teaspoon baking soda
– 1/2 teaspoon salt
– Water (as needed)
Instructions:
1. Begin by sterilizing your mason jars in boiling water and letting them dry completely. Once dry, grease the insides of the jars with cooking spray to prevent the bread from sticking.
-
In a mixing bowl, beat together the shortening (or butter) and sugar until well combined. Then, add the eggs, mashed bananas, and a splash of water to the mixture and blend thoroughly.
-
In a separate bowl, combine the dry ingredients, which include all-purpose flour, baking soda, and salt. Mix these ingredients well before gradually adding them to the wet mixture, stirring until just combined.
-
Spoon the batter into the prepared mason jars, filling them one-half to two-thirds full. If desired, you can fold in some chopped nuts or chocolate chips at this stage for added texture and flavor.
-
Preheat your oven to 325°F. Place the filled mason jars in a tall-sided baking dish and fill the pan with hot water until it’s about one-third full. This water bath will help the banana bread cook evenly and keep it moist.
-
Bake the jars for 40-60 minutes, or until a toothpick inserted into the center of the bread comes out clean. Check on the jars as they bake, and rotate them if necessary for even cooking.
-
Once baked, carefully remove the jars from the oven and let them cool for a few minutes. Afterward, screw on the lids and rings while the bread is still warm; the jars will seal as they cool. You should hear a “ping” indicating that they’re sealed properly.
-
To check if the jars are sealed, press down on the lid. If it doesn’t “give,” your jars are sealed and ready for storage.
As you commence your banana bread baking journey, remember to clean the rims of the jars thoroughly before sealing to guarantee a good airtight fit.
Be cautious with the hot jars and equipment during both the baking and sealing processes, as safety is paramount. Finally, don’t hesitate to experiment with different mix-ins or variations to create your perfect version of banana bread!
Final Thoughts
Creating Banana Bread in a Jar isn’t just about the recipe itself; it’s about the overall experience and the joy it brings. This delightful treat is perfect for sharing or enjoying solo.
Remember, proper sealing is key to maintaining safety and extending shelf life. Sealed jars last up to 1 year in cool, dry places, while the fridge keeps them fresh for a week. If you need longer storage, freeze them for a few months.
When giving these jars as gifts, consider decorative lids with fabric and labels for a personal touch. A gentle shake helps remove the bread easily, and using straight-sided, wide-mouth mason jars simplifies the whole process.
Before baking, don’t forget to sterilize your jars and lids to prevent bacteria. Place jars in a water bath while baking to guarantee even cooking, which also helps enhance the texture of the bread by providing moist heat during baking.
Adjust your recipe with gluten-free flours, sugar alternatives, or spices to cater to different diets and preferences.
Ultimately, banana bread in a jar offers a fun, portable way to enjoy a classic treat while being mindful of storage, preparation, and presentation.
FAQ
If you’re curious about making banana bread in a jar, you might’ve questions about the process, ingredients, or storage.
First, confirm you have wide-mouth mason jars for easy filling and cooling. Preheat your oven to 325°F.
For the batter, use shortening, sugar, eggs, mashed bananas, flour, baking soda, baking powder, and salt. You can also add optional ingredients like nuts or spices to improve flavor.
When baking, fill the jars halfway or up to 2/3 full to allow for expansion. Bake for 40-45 minutes, and check if a toothpick comes out clean from the center. Remember not to put lids on while baking; they should go on immediately after taking the jars out. The unique presentation of banana bread in jars makes them ideal for sharing at gatherings.
To store, refrigerate the sealed jars for up to a week. Make certain to sterilize both your jars and lids beforehand to avoid bacteria.
If issues arise, like overbaking, pull them out promptly once a toothpick tests clean. Properly sealing lids helps maintain freshness.
Finally, you may consider adding yogurt or chocolate chips for a fun variation. Happy baking!