Puri Recipe Video – Learn to Make Fluffy Indian Bread
Puri Recipe Video – Learn to Make Fluffy Indian Bread
When you’re ready to enhance your culinary skills, making puris can be a rewarding experience. This video guides you through each step, from selecting the right ingredients to mastering the frying technique that guarantees a perfect puff. You’ll uncover how simple it is to create this versatile Indian bread that pairs beautifully with various dishes. But what makes this recipe truly special, and how can you take it to the next level? Investigate the cultural significance and tips that make all the difference.
Why You’ll Love This Recipe
You’ll absolutely love this Puri recipe for its simplicity and delightful versatility. Making Puri is straightforward, requiring just a few common ingredients: wheat flour, salt, and water. You can amplify the taste by adding semolina, ghee, or yogurt, but those are optional. A non-sticky, stiff dough is vital, so don’t over-knead it. Roll the dough into moderately thick discs to guarantee they fry evenly.
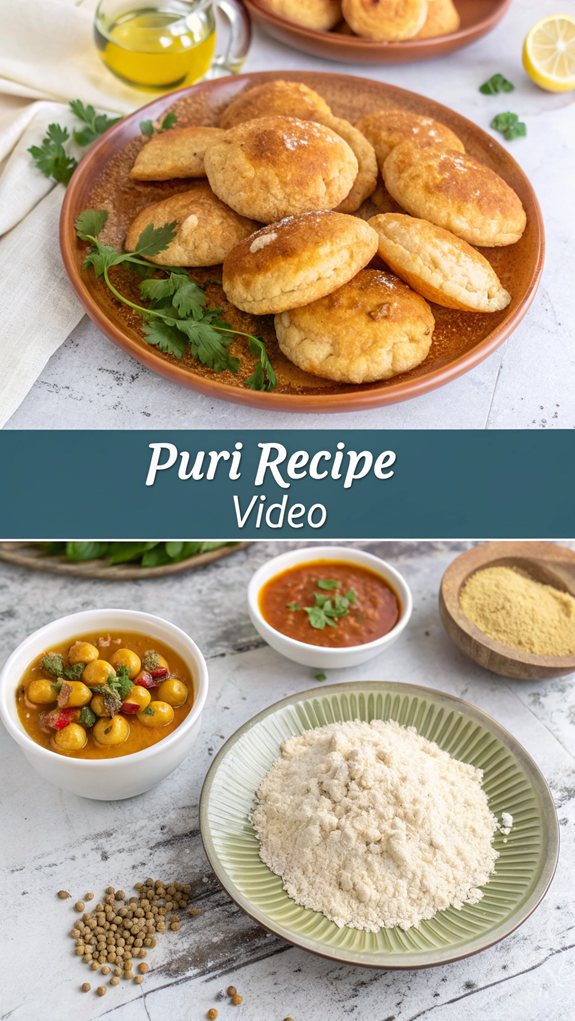
The beauty of Puri lies in its pairing potential. Serve them with Puri bhaji, Chana curry, or coconut chutney for a satisfying meal or sweet options like Suji halwa, Basundi, or Shrikhand. They’re commonly enjoyed at breakfast or during festive occasions. Additionally, using whole wheat flour gives the puris a nutty flavor that enhances their overall taste.
Pay attention to your frying technique. Confirm your oil is hot enough—test it with a small piece of dough. If it sizzles but doesn’t brown too quickly, you’re ready to fry. Fry in batches to maintain consistent oil temperature and achieve that ideal puffiness.
If you face common issues, like hard or non-puffed Puris, adjust your dough consistency, rolling thickness, and frying temperature. With practice, you’ll master this delicious dish. Enjoy your cooking!
History
Puri has stood the test of time, tracing its roots back to the Vedic age in ancient India. This delicious bread is known as ‘Pucca Khaana’ because it’s traditionally cooked with ghee, a clarified butter revered for its quality.
During Vedic times, puri held ritualistic significance due to its preparation with ghee, highlighting its importance in sacred meals. The traditional preparation methods showcase its historical significance in India’s culinary practices.
Jump forward to the 8th and 9th centuries, and you can find puri woven into stories from the Mahabharata, where Draupadi is credited with inventing pani puri. Its ancestral dish, Pulkis, emerged in the Magadha kingdom around 600 B.C., marking the beginning of its delightful evolution.
As puri traveled across India, it adapted into various regional varieties like Aloo Ki puri, luchi, and Masala Puri.
Today, puri is celebrated across the nation, often featured in festive breakfasts. With each cultural layer added, puri continues to delight people of all ages, proving that this simple yet versatile bread has woven itself into the fabric of Indian cuisine.
Its journey reflects the rich culinary history that connects you to the heart of India.
Recipe
Puri Recipe Video
Puris are delightful deep-fried Indian bread that are crispy on the outside and soft inside, perfect for accompanying a variety of dishes. Making puris at home is simpler than you might think, requiring just a few basic ingredients, some kneading, and frying.
They’re often enjoyed with spicy curries or as part of festive meals, making them a favorite among many. To achieve the perfect puri, the dough must be prepared correctly, rolled evenly, and fried at the right temperature. The key to getting them to puff up beautifully lies in the heat of the oil and the rolling technique, which both directly impact the puffiness of the pooris.
Follow this recipe to create delightful puris that will impress your family and friends.
Ingredients
- 1-2 cups of Indian wheat flour (atta)
- 1-2 tablespoons of fine semolina (optional)
- 2-3 tablespoons of oil or ghee
- ¼ to 1 teaspoon of salt
- ¾ cup of water (adjustable as needed)
Cooking Instructions
- In a large mixing bowl, combine the wheat flour, optional semolina, and salt. Add the oil or ghee and mix well with your hands until the mixture is crumbly.
- Gradually add water to the mixture, kneading lightly to form a stiff dough. Be careful not to over-knead, as this can make the puris oily.
- Allow the dough to rest for a maximum of 3-5 minutes. This will help to maintain the puris’ crispiness once fried.
- After resting, divide the dough into 8-10 equal portions. Roll each portion lightly between the palms of your hands to smoothen them out.
- Roll each portion of dough into a moderately thick disc, guaranteeing it’s even from the center to the edges.
- Heat oil in a deep pan over medium-high flame. To check if the oil is ready, drop a small piece of dough into the oil; it should sizzle and rise.
- Carefully place the rolled dough discs into the hot oil. Fry until they puff up and turn golden brown, turning occasionally for even cooking.
- Once cooked, remove the puris from the oil and drain them on paper towels to eliminate excess oil.
Extra Tips
To make certain your puris puff up perfectly, make sure your oil is hot enough before frying. Rolling the puris evenly and not using too much pressure while rolling can also contribute to their puffiness.
Additionally, serve puris immediately after frying for the best taste and texture. Enjoy experimenting with different curries or side dishes to complement your puris!
Final Thoughts
Although making puris might seem challenging at first, you’ll find that the process is straightforward and rewarding. These fluffy Indian breads are a fantastic addition to various dishes, enhancing your meals with their delicious flavor and texture. You can serve puris alongside classic options like aloo ki sabzi, chole, or halwa for a satisfying meal.
For the best results, pay attention to your dough. It should be firm and smooth, so give it time to rest for at least 10-15 minutes before rolling. Kneading the dough correctly is essential for achieving the perfect puri.
As you fry the puris, watch the oil temperature carefully; a small piece of dough should float immediately if the oil is hot enough. Fry them one at a time, gently pressing with a spatula to help them puff.
To enjoy puris at their best, consume them fresh on the same day. Their crispness diminishes when stored. If you anticipate leftovers, consider halving your recipe or sharing with friends and family.
With various serving ideas and cooking tips at your disposal, you’re set to master puris and enhance your cooking repertoire. Happy frying!
FAQ
In relation to making puris, you likely have a few questions about the process. First, when preparing the dough, mix flour and salt together. Gradually add water, forming a firm dough. Knead it until smooth, then cover it and let it rest for at least ten minutes.
After resting, you can divide the dough into small balls, usually 8 to 16.
When rolling puris, make sure your rolling surface has some oil to prevent sticking. Roll the dough into discs that are moderately thick, about 4 to 7 inches in diameter. It’s helpful to make 5 to 6 puris before frying, without stacking them.
For frying, heat oil to medium-high, ideally between 360F-380F. Test the oil by dropping a small piece of dough in; it should float immediately. Fry each puri one at a time. Press gently with a slotted spoon to help it puff up. After frying, drain excess oil on paper towels.
You can use whole wheat flour for traditional puris or a mix with all-purpose flour. If you’re batch cooking, keep the oil cool between fries for better results. Additionally, using medium-hot oil will help achieve the perfect puffed texture for your puris.