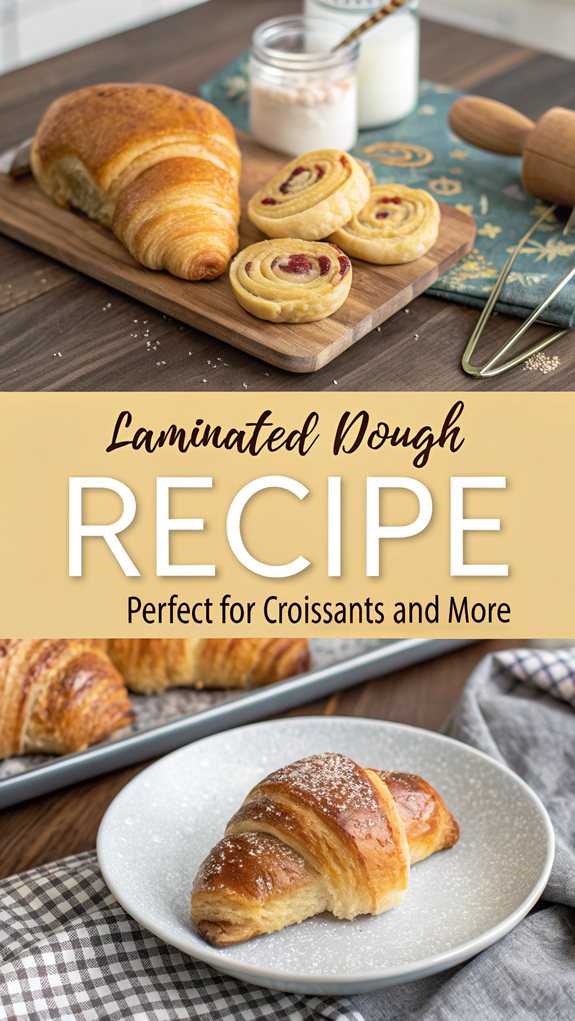
Laminated Dough Recipe – Perfect for Croissants & More
Laminated Dough Recipe – Perfect for Croissants & More
You want the simple pleasure of a flaky croissant, yet the thought of mastering laminated dough feels intimidating. This key technique not only enhances your baking but also opens the door to an array of delicious pastries. With a few essential ingredients and some careful steps, you can create a texture that’ll impress even the most discerning palate. As you begin to layer and fold, you’ll realize why patience transforms mere dough into something extraordinary. Are you ready to investigate the nuances that make this process worthwhile?
Why You’ll Love This Recipe
If you’ve ever craved flaky, buttery pastries, this laminated dough recipe will become your go-to.
One reason you’ll love this recipe is its versatility. You can use laminated dough to create a wide range of pastries, from croissants and Danish to puff pastries. This means you can easily customize flavors and enjoy sweet or savory treats, catering to different tastes.
The professional results you achieve will impress you. By using a dough sheeter machine, you guarantee consistent thickness and save time on laminating. The machine reduces the physical strain involved, allowing you to focus on perfecting your pastries. Plus, gentle handling results in higher quality dough. Additionally, understanding the importance of refrigeration between turns ensures the butter remains solid for optimal layering.
Key techniques in this process, such as creating layers, are vital for that signature flakiness. Refrigerating the dough between turns prevents the butter from melting into it. More turns mean more layers, leading to even flakier pastries. Remember, keeping your butter cold is essential for success.
With this laminated dough recipe, the creative possibilities are endless.
Whether it’s sticky buns or kouign-amann, you have the freedom to experiment and expand your pastry repertoire. Enjoy finding new flavor combinations and shaping your delicious creations!
History
Laminated dough has a rich and intriguing history that enriches its allure. Originating in France in the 1600s, legends say that Claudius Gele and Claude Lorrain created the first puff pastry to help sick family members. However, these tales are likely mythical, leaving the true roots of laminated dough unclear.
Early forms did appear in France and Spain, showcasing the technique of layering fat with flour and water. Interestingly, a similar layered bread called “mussamana” was found in Al-Andalus as early as the 1300s. This bread included yeast, making it closer to what’s understood as croissant dough today. The idea of lamination likely evolved from independent innovation or influences from Arabic baking methods.
As time passed, the original doughs transformed into various pastries, including croissants and Danish. It is important to note that the true origins of puff pastry remain uncertain due to historical misattributions and the mythical nature of figures like Claudius Gele. Thanks to advancements in technique, you can now easily achieve flaky layers.
Modern methods utilize cold butter and mixers, streamlining the process. This evolution has made a broader range of pastries accessible, allowing you to enjoy the rewarding experience of working with laminated dough.
Recipe
Laminated Dough Recipe
Creating laminated dough may seem intimidating, but with a bit of patience and attention to detail, you can achieve beautiful layers perfect for croissants, pains au chocolat, and other delightful pastries. This dough involves a meticulous process of mixing, resting, rolling, and folding to incorporate cold butter into the dough, creating those celebrated flaky layers. The concept of lamination in baking is crucial for achieving this light and airy texture, as it mimics the layering found in office supplies.
The key is to keep the butter cold while working with the dough, as this results in a light and airy texture once baked. Before you get started, verify you have all your ingredients measured and ready. This will streamline the process and guarantee that each step is easier to manage.
Once you have mastered this technique, you can experiment with different fillings and shapes to make a variety of delicious baked goods.
Ingredients:
– 4 cups (20 ounces) unbleached all-purpose flour
– 2 to 9 tablespoons sugar
– 4 teaspoons active dry yeast or 1 tablespoon instant yeast
– 3 ½ sticks (14 ounces) cold unsalted butter
– ½ cup (4 ounces) warm whole milk (110°F to 115°F)
– 1 cup (8 ounces) cold milk
Instructions:
1. In a stand mixer fitted with a paddle attachment, combine the flour, sugar, yeast, and cold butter pieces. Mix on low speed until the mixture resembles coarse crumbs.
2. Gradually add the warm milk and cold milk, mixing until a rough mass forms. Avoid overmixing.
3. Briefly knead the dough by hand 3 to 5 times to bring it together, then wrap it loosely in plastic wrap. Refrigerate for 30 to 60 minutes to allow the dough to rest.
4. On a lightly floured surface, roll out the dough into a rectangle, making certain it’s thin enough for lamination.
5. Prepare the butter block by spreading the cold butter flat to match the dough’s dimensions. Place the butter block onto the rolled-out dough and fold the dough over it to encase the butter.
6. Perform 3 envelope folds: fold the dough into thirds, similar to folding a letter. After each fold, chill the dough in the freezer for 20 minutes to keep it cold.
7. Once all folds are complete, refrigerate the dough for at least 2 hours or overnight to promote flavor development.
8. Roll out the dough to the desired size for cutting into triangles or shapes for croissants, pains au chocolat, etc.
9. Cut the dough into your desired shapes, roll them up, and place them on a baking tray lined with parchment paper.
10. Allow the shaped pastries to proof at room temperature until they’ve doubled in size.
11. Preheat your oven and bake the pastries at the appropriate temperature and time based on the specific recipe instructions. Let them cool before serving.
Extra Tips:
When making laminated dough, the temperature of your ingredients is essential for a successful rise and flakiness. Confirm that both the butter and the dough remain as cold as possible throughout the process.
If at any point the butter starts to soften too much, place the dough back in the refrigerator or freezer to firm it up before continuing. This will help maintain the distinct layers that make laminated pastries a favorite!
Final Thoughts
While mastering laminated dough may take practice, the rewards are well worth the effort. When you get the hang of this technique, you’ll impress everyone with flaky croissants and buttery pastries. The key is in the lamination process, which involves rolling and folding dough with cold butter to create thin layers. Remember, each fold adds depth and texture, so don’t rush.
Using the right ingredients helps too. Strong bread flour and European-style butter will give you the best results. Confirm your butter is cold but pliable; pounding it slightly can aid in achieving the perfect consistency. Always allow the dough to rest between rolls, and keep it chilled to maintain that buttery goodness. Additionally, mastering the laminated dough technique opens up a world of possibilities for various pastries, such as croissants and kouign-amann.
As you roll and fold, focus on consistency. The envelope or book fold technique works well for laminating dough. Pay attention to the temperature; too warm or cold butter can spoil your layers.
Finally, don’t overwork your dough; you want fluffy, not tough pastries. With each attempt, you’ll improve and ultimately create mouthwatering treats that are worth every moment spent learning this delicious craft.
FAQ
If you’ve got questions about laminated dough, you’re not alone—many bakers seek to clarify this intricate process. Laminated dough is created by layering butter and dough, which gives pastries that flaky texture you love. Make certain to use high-fat butter, strong flour, milk, and yeast for the best results.
When preparing your dough, mix the ingredients until they form a sticky mass. Let your dough proof for about two hours in a warm spot before chilling it. For butter, soften it to around 55°F, but maintain it cold. This temperature control is vital to keep the layers intact during rolling. Resting the dough overnight in the fridge improves its extensibility and makes it easier to roll.
During the lamination process, you’ll roll and fold the dough multiple times. Chill the dough for 30-45 minutes between each turn. Use either an envelope or letter fold to create those essential layers. Remember to brush off excess flour to prevent the dough from gumming up during baking.
Lastly, be patient. Chill your laminated dough overnight before cutting and shaping it into pastries. This extra step improves the final product’s texture, guaranteeing your croissants or danishes turn out perfectly flaky.