Bread Recipe with Self-Rising Flour – Easy Homemade Loaf
Bread Recipe With Self-Rising Flour – Easy Homemade Loaf
Did you know that nearly 75% of households in the U.S. bake bread at home at least once a year? If you’re among them and want to simplify the process, using self-rising flour can be a game-changer. This method allows you to skip kneading and lengthy rise times while still achieving a delicious, homemade loaf. But what if you could create this delightful bread in just ten minutes with minimal ingredients? The ease of this recipe might just inspire you to experiment further in your kitchen.
Why You’ll Love This Recipe
Uncovering the joys of baking can be a delightful experience, especially with this self-rising flour bread recipe. You’ll love how quick and easy it is. With only four ingredients, you can whip up a loaf in under 10 minutes. No kneading is required, and you won’t need to wait for rising time. This is a great option for new bakers looking to build confidence in the kitchen.
The convenience of self-rising flour is another bonus. It already contains baking powder and salt, so you can remember fewer ingredients. You can also switch out yeast for beer in some recipes to improve flavor. Self-rising flour ensures a consistent rise in baked goods, adding to its appeal in this recipe.
This recipe showcases a rustic loaf that’s perfect for unexpected guests or quick lunches. You’ll achieve consistent results every time you bake. The lower protein content in self-rising flour gives your bread a lighter and flakier texture.
Because it works well for no-yeast bread, you won’t have to worry about additional leavening agents. With a crispy crust and a soft interior, this bread is both reliable and delicious. Overall, it’s a perfect choice for anyone aiming to bake with minimal effort and time.
History
Baking with self-rising flour not only simplifies your kitchen routine but also has an interesting backstory. The concept was introduced by Henry Jones, an English baker, in 1845. His goal was to address the problem of yeast spoilage during long sea voyages, which often resulted in dry, moldy bread for the British Navy.
In 1846, Jones received a British patent for his innovative flour that combined sodium bicarbonate and tartaric acid with all-purpose white flour. This self-leavening flour allowed sailors to bake without needing traditional yeast, making it easier to produce fresh bread on long journeys.
After a decade of promotion, it was officially adopted by the Navy in 1856. This was significant for the Navy’s bread quality, as it provided an alternative to yeast, which spoiled easily.
The popularity of self-rising flour quickly spread worldwide, thanks in part to the support of notable figures like Florence Nightingale. It became a staple in Southern U.S. kitchens, playing an essential role in recipes for biscuits and muffins.
Today, self-rising flour comes with a six-month shelf life and guarantees consistent results in quick breads and cakes. With its convenience and efficiency, it remains a favored choice among home bakers.
Recipe
Bread Recipe with Self-Rising Flour
Making bread with self-rising flour is an uncomplicated and quick process that yields delightful results. Unlike traditional bread, this recipe eliminates the need for rising or proving time, allowing you to enjoy freshly baked bread in no time. Utilizing self-raising flour provides you with the necessary leavening agents, resulting in a light and fluffy loaf perfect for any meal or snack. This versatile recipe allows for customization with various ingredients. You can experiment with different types of milk or oils, and even add unique flavors by using ingredients like beer or flavored liquids. Additionally, using fresh self-raising flour is key for achieving maximum effectiveness in your bread’s rise.
Follow this simple recipe to create a delicious bread that can be enjoyed plain, with butter, or as a complement to your favorite spreads and dishes.
Ingredients:
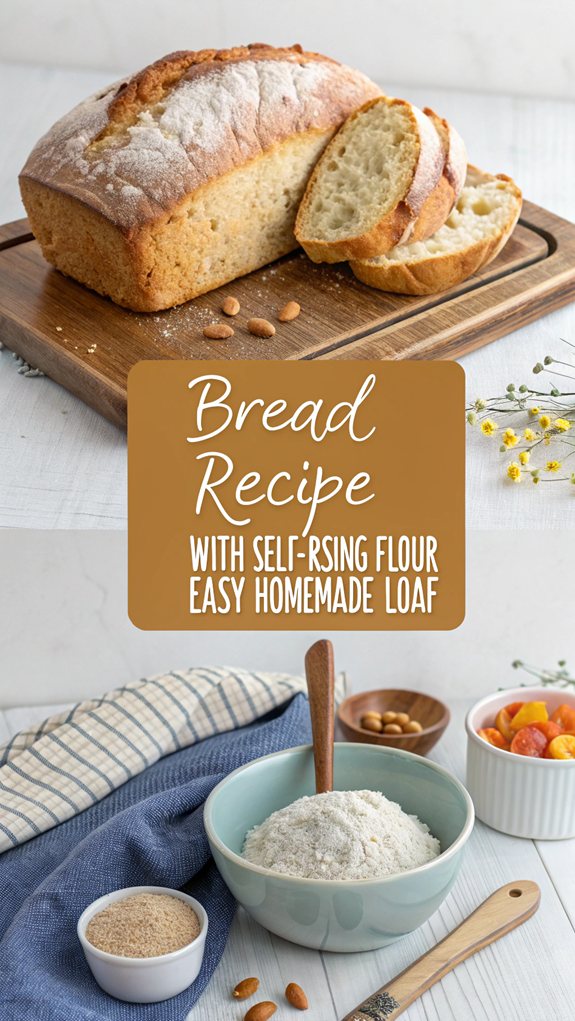
– 500g white self-raising flour
– 1 teaspoon salt
– 300ml milk (dairy or plant-based)
– 2 tablespoons oil (optional)
Cooking Instructions:
-
Preheat your oven to 190°C (375°F). Place a baking sheet or stone in the oven to heat up while you prepare the dough.
-
In a large mixing bowl, combine the self-raising flour and salt. Gradually add the milk and oil, mixing until a rough dough forms.
-
Turn the dough onto a lightly floured surface and knead briefly until smooth. Be careful not to over-knead; it should just come together nicely.
-
Shape the dough into a flat disc about 1½ inches (3 cm) thick. Transfer the disc to the preheated baking sheet.
-
Using a sharp knife, score a deep cross on top of the dough, cutting most of the way through. This will help the bread rise evenly while baking.
-
Immediately place the dough in the oven and bake for 35 minutes or until the bread is golden brown and sounds hollow when tapped on the bottom. For a different texture, you can preheat the oven to 200°C (400°F) instead.
Extra Tips:
To guarantee the best results, always use fresh self-raising flour to maintain the effectiveness of the raising agents. If you have older flour, consider using homemade self-rising flour by mixing all-purpose flour with baking powder and salt.
For added flavor, feel free to substitute part of the milk with beer or sparkling soda for a softer, chewier texture. Enjoy experimenting with various ingredients to find your favorite variation!
Final Thoughts
When you’re looking for a quick and satisfying way to enjoy homemade bread, this self-rising flour recipe shines. It’s simple and requires minimal ingredients—typically just self-rising flour, milk, salt, and an optional touch of oil or beer. You don’t need yeast, which saves time and simplifies the whole process.
Mixing the ingredients takes less than 10 minutes, and after about 35-40 minutes in the oven, you’ll have a rustic, hearty loaf ready to serve. Notably, using whole milk provides the best texture for the bread.
Versatility is another key benefit. You can use dairy or plant-based milk, and vary the added ingredients to improve the flavor and texture. This bread fits perfectly at breakfast, lunch, or dinner, pairing well with various toppings.
Plus, it stores well for a few days and can be toasted later for added crunch.
For the best results, verify your self-rising flour is fresh. Don’t over-knead your dough; keep it just enough to combine. Scoring the dough helps it rise evenly, and preheating your oven with a baking sheet can enhance your loaf’s final texture.
With these tips, you’re set for an easy, homemade bread experience.
FAQ
If you have questions about making bread with self-rising flour, you’re not alone. Let’s address some common concerns.
First, make sure to use fresh self-rising flour. Old flour may not rise correctly because its raising agents can oxidize over time. For a basic recipe, combine self-rising flour, a pinch of salt, milk, and optional oil. You won’t need yeast or kneading time, which simplifies the process.
When baking, preheat your oven to 190°C (375°F). Shape your dough into a flat disc, no thicker than 1½ inches. This helps it cook evenly. Don’t forget to score the top with a deep cross to allow for expansion. Using self-rising flour can result in a quick and easy bread that’s perfect for everyday use.
Self-rising flour creates a dense, moist bread, perfect for quick meals and snacks. If you’re out of self-rising flour, mix all-purpose flour with baking powder and salt to make your own. You can also try adding beer for flavor, or incorporate herbs and cheese for variety.
Lastly, avoid overmixing the dough; this could toughen your bread. Remember to let your loaf cool completely before slicing for cleaner pieces. Enjoy your baking adventure!